
What do you think of when you hear a quilter is using Photoshop? Manipulated photos printed on a home printer? Kaleidescopic images? Tiled pattern repeats? Yes, Photoshop is good for this, but it’s so much more. Photoshop is also a tool to help you finish that UFO (unfinished object) that’s been sitting in your closet for years.
I took a workshop from Rosalie Dace at Pacific International Quilt Festival in 2006. It was a fun class, and I had every intention of finishing the piece as soon as I got home. Yeah, right. Every couple of years, I’d pull it out of my UFO box, admire the design, pet it a couple of times, then put it back in the box.
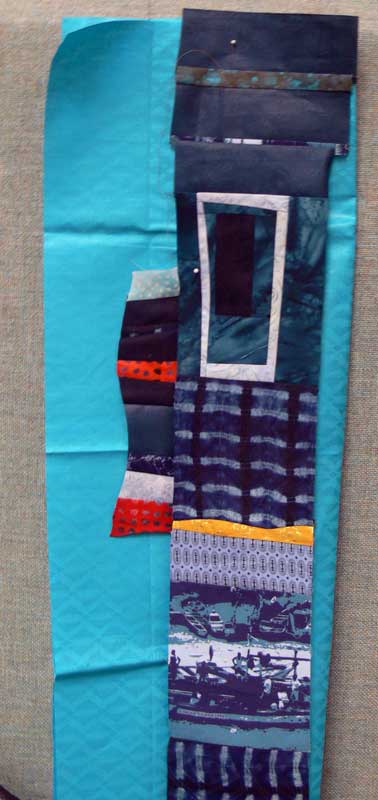
If I was feeling really ambitious, I’d add on a few fabric strips, then put it back in the box.
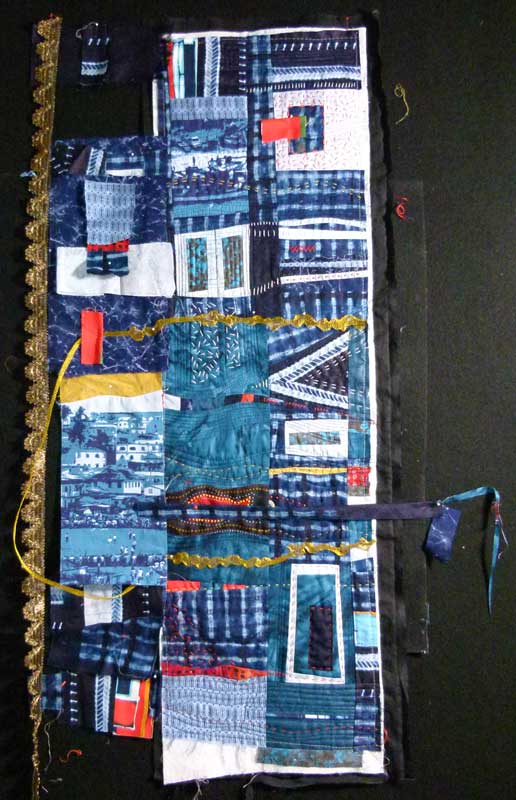
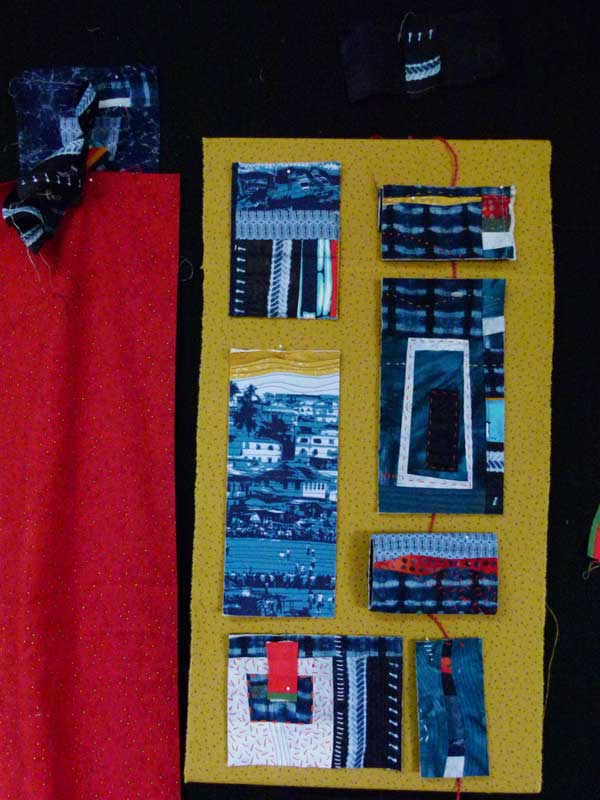
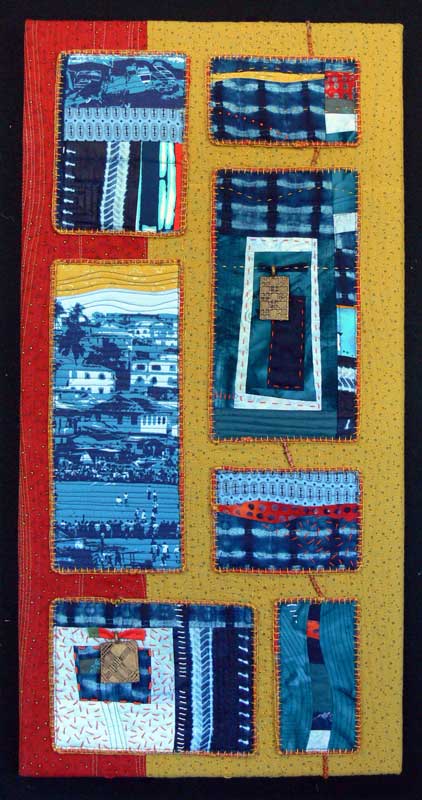
Last year, Kris and I took the month of December off. I decided this was the time to finish this piece. I added more pieces, gave it batting and a backing, and added hand and machine stitching, but it wasn’t speaking to me. If I am really stuck, and Kris isn’t around to give me her two cents worth, I’ll take a photo of the piece and open it in Photoshop. Why? I can “cut” it apart without using a seam ripper and add more fabric without using the sewing machine. I really liked some sections of the piece but not everything. So with my handy rectangular selection tool, I made a selection of those parts and “cut them out.” I tried putting them back together in a different way – in Photoshop. It still didn’t speak to me, but as soon as I had several of the pieces separated from each other, things started looking interesting. At first I thought I could make fabric post cards, but some parts looked best smaller. The individual pieces looked good as a grouping, so I “auditioned” some background “fabric” in Photoshop. That means I scanned the fabric and opened the fabric file in Photoshop. I then started putting the small parts on top up of the fabric. The dull yellow fabric looked good, but so did the red. Only after playing around with the design on the computer a little bit more did I take out the rotary cutter. Yep, I sliced and rotated and sliced some more.
I could have pieced the parts together with the background, but I liked the way the pieces looked when they were placed on top of the background. Then I had another “Aha!” moment. I remembered the Craftsy class I had taken last fall: Carol Ann Waugh’s Stupendous Stitching. One neat thing I took away from that class was Carol’s method of using rattail cording to “bind” the edge of the quilt. I didn’t have any rattail in coordinating colors, but I know how to make cording. I tried knitted I-cord, twisted cording, and even some ribbons. Again, nothing worked until I remembered the machine-wrapped cording technique I learned from Linda Matthews in an e-book from 2008. I got out some of my decorative thread, some old “yucky” yarn, and experimented. Eureka! That would be my rattail cord. I ended up stitching the cording on by hand with perle cotton. It gave me just the textured edge I was looking for. I then stretched the piece over stretcher bars, added some treasures I picked up in Ghana, and I had my a finished quilt.
All this thanks to Photoshop and techniques I’ve learned here and there in various workshops. If you want to learn more about how to use Photoshop to help with creative breakthroughs, take one of our 2014 Photoshop classes in Kona, HI, New Smyrna Beach, FL, or Lake Tahoe, NV. Click here for more information.
One response to “Tech Tuesday: Photoshop Is Not Just For Designing Fabric!”
The challenge I have is finding a digital printing company in the USA that offers real silk fabrics— instead of polyester or other “silky feel” of synthetics.
Great suggestions/recommendations would be very helpful and appreciated.
Thank you.