
Quilt photography is a necessary expenditure of time and/or money if you want to enter your quilts in shows. Our advice is to have have your work professionally photographed. And that’s ususally what we do. But there are those cases when you don’t have a good photograph. You know, the time when you are so happy to complete the quilt in time to mail it off without having to pay for overnight service that you just have time to snap a photograph. Or you no longer have the quilt to have it photographed professionally, but lucky you, Uncle Bob snapped it on his phone when he last visited. Or it is a professional photograph, but the editor wants a white background when you had it photographed on black. Sometimes you just have to manipulate the photo. Photoshop Elements has several tools that will help you remove the background from the quilt.
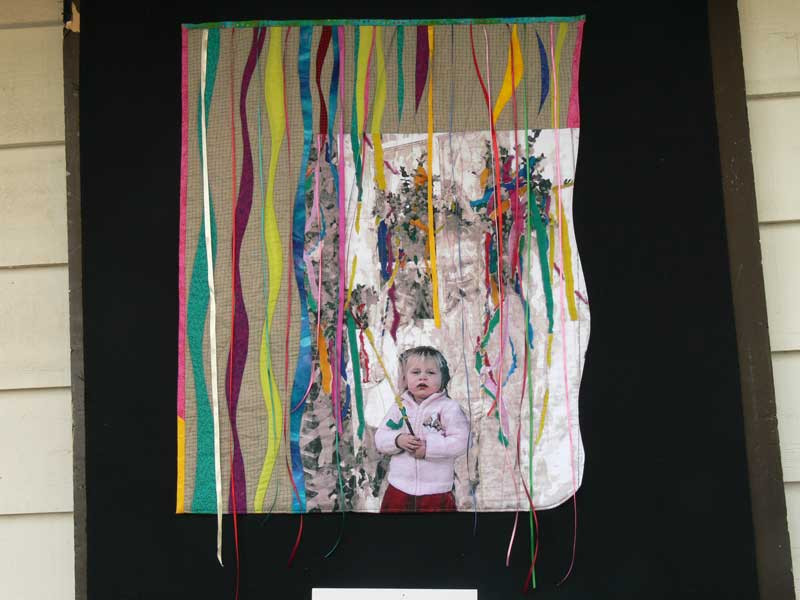
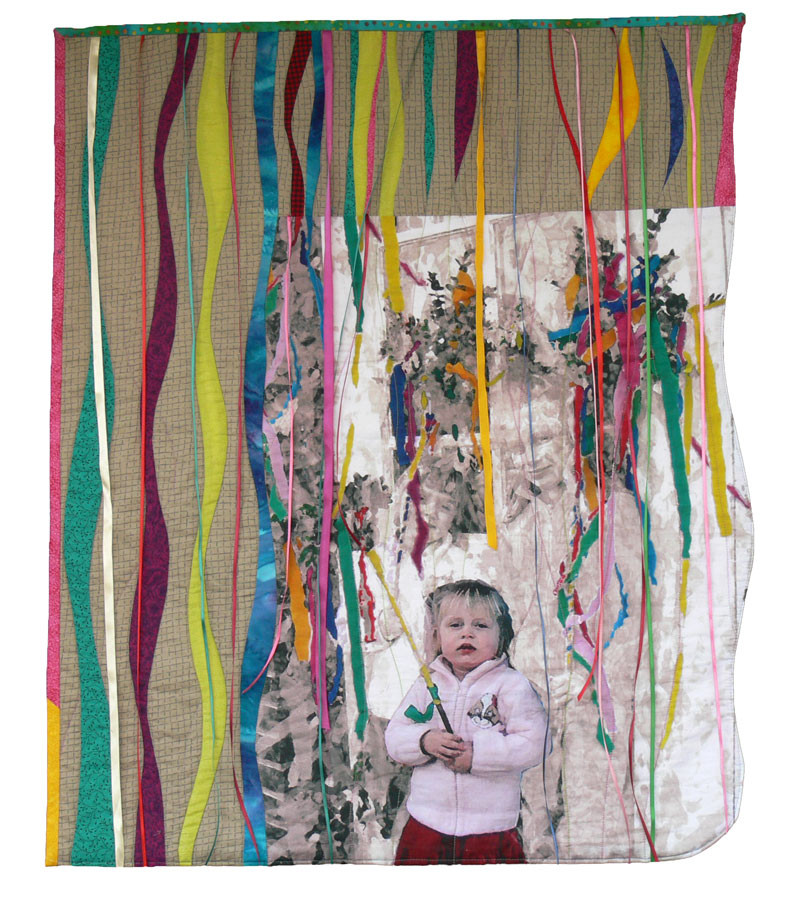
Even though “Endlich ein Quilt für Tizia” has a solid black background, it’s a great quilt for showing the differences between some different tools. In this post, I’ll try four different ways to remove the background from the quilt:
Background Eraser ![]()
Magic Eraser ![]()
Magic Wand (Make a selection and then delete the background) ![]()
Quick Selection (Make a selection and then delete the background) ![]()
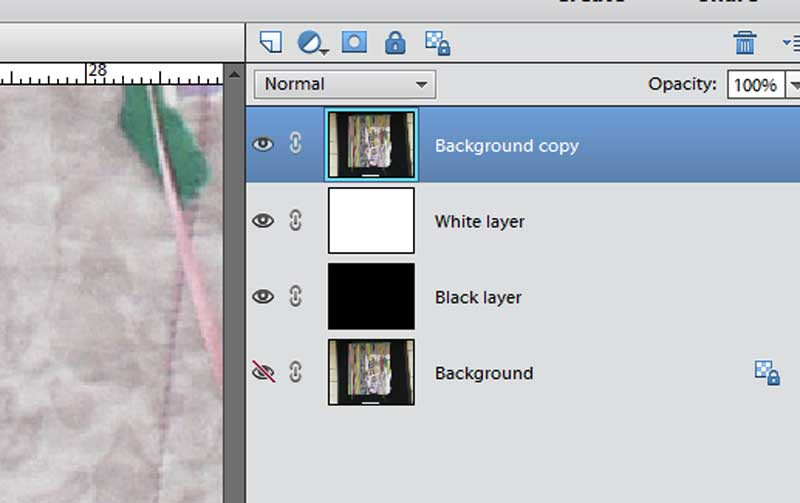
Whichever tool I use, it’s best to duplicate the layer first—just in case! Yes, I’m paranoid. But the tools work differently depending upon whether the image is a background layer or a “regular” layer.* So here’s what I did to this image before testing the different background removal techniques:
- Duplicate the background layer (Layer > Duplicate Layer, just leave the default options in that window, and click OK). The new layer is called Background copy. Notice this layer is not locked.
- Turn off the visibility of the Background layer (the original one) by clicking on the eyeball in the Layers panel.
- So that I could see the details of what’s happening, I created 2 new layers. I filled one with white and the other with black. I put both of those layers below Background copy.
- Then I made sure that Background copy was the active layer (click on that layer in the Layers panel).
If you want to try out the tools using my file, here’s a link to it: www.pixeladies.com/PixeladiesFiles/PixeladiesImages/TiziaQuiltForWeb.jpg
So which tool to try first? Well, since we want to erase the background, it only makes sense to try the Background Eraser first. (If you don’t see this tool, press the Alt/Command key and click on the regular eraser in the tool bar. It will cycle through all the options). In this example I turned off the black and white layers.
To use Background Eraser, you place the crosshairs over the background color with the circle just barely overlapping the edge of the quilt. As you click and drag your mouse, you will see the black areas under the circle disappear. But depending on the color of your quilt, and the color of the background you’re trying to get rid of, the tool may have erased part of your quilt. (Remember, gray and white checks are Photoshop’s way of telling you that nothing is there—it’s clear).

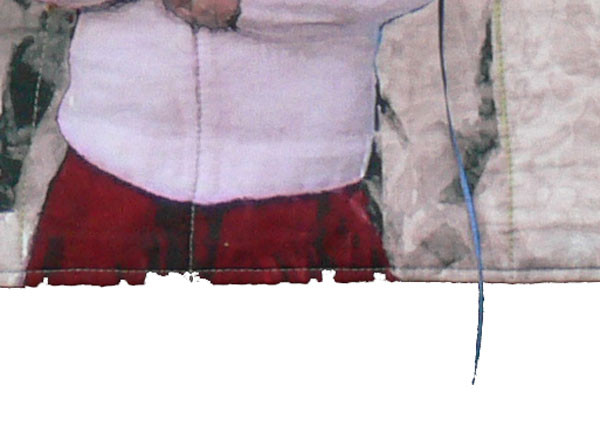
See what a nice job it did when there was a high contrast between the gray on the right-hand side and the black background, but how much of the dark red of Tizia’s skirt was also deleted. (For these examples, I’m not worried about the ribbon parts that extend into the background. If you want me to get really detailed, leave a comment and I’ll post another entry.) If you want to see what’s really left, turn on the white layer. See the mottled area? That’s part of the background that’s not really erased.
I don’t like that very much! Let’s move on to the next tool. Make another duplicate of the original background layer. Put it at the top of the Layers panel and turn off Background copy. Make sure Background copy 2 is the active layer. Choose the Magic Eraser. This time, just click on some part of the black background. Presto! The black background is gone. But again, so is part of my quilt. But if I turn on the white layer again, you can see that there’s no mottling left. It’s better, but I still don’t like the results.

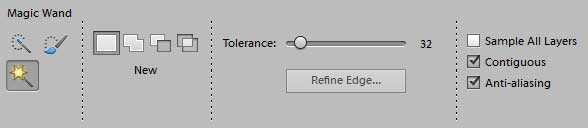
The third tool to try is the Magic Wand. The Magic Wand makes a selection of the color you click on. Make another duplicate of the original Background layer, put it at the top of the Layers panel, make sure it is the active layer, and turn off the rest of the layers. In the Options bar for the Magic Wand tool, make sure that Sample All Layers is NOT checked, Contiguous is checked, and Anti-aliasing is checked. My Tolerance slider is set at the default of 32.
Click on a black part of the background. The “marching ants” will appear.
Click on the delete key on your keyboard, and the black will disappear. The results are very similar to the results using the Magic Eraser tool. Turn on the white or black layers to see how the edge looks.
The last tool to try is Quick Selection. Make another duplicate of the Background layer, put it at the top of the Layers panel, and turn off the rest of the layers. My settings for this tool are Sample All Layers is NOT checked, Auto-Enhance is checked. Also, the middle icon (Add) is the highlighted option:

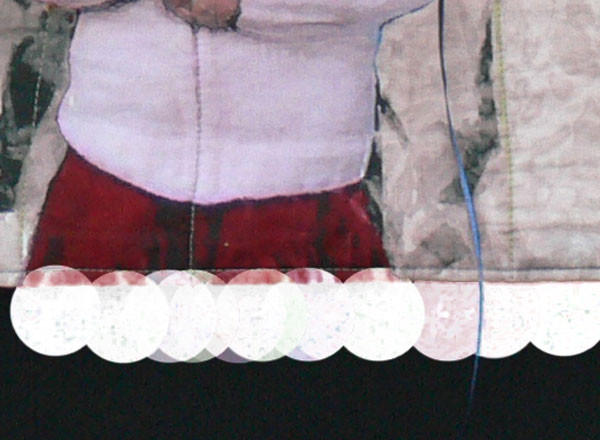
To use this tool, click and drag in the black part of the background. You don’t have to be close to the quilt. In fact, if you drag over the quilt, it will start to be part of the selection. Again the “marching ants” will appear and you will click on the delete key on your keyboard to make the black part of the background disappear. The dark red part of the skirt has also disappeared. I don’t like that, but I do like the edges of the quilt. Plus I know how to edit the selection so that the red isn’t included.
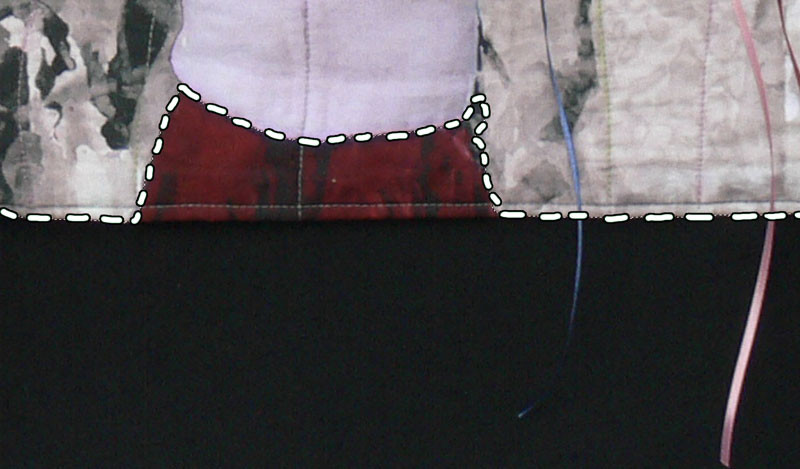
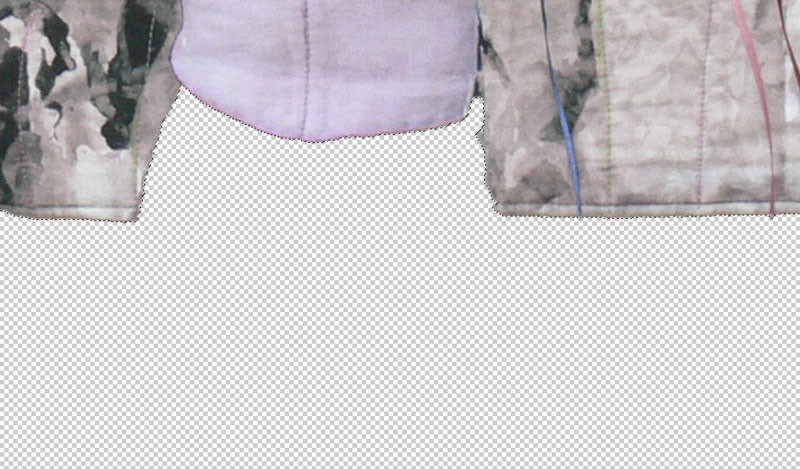
Press undo until you have the background back and the selection that doesn’t include the red of the skirt. Press the Alt/Option key, then carefully click and drag over just the red part of the quilt to remove it from the selection. You might have to zoom in to see this. If your brush is larger than the red area, make your brush smaller. You don’t want to drag it over any of the black area. Notice how the “marching ants” don’t include the red part of the quilt anymore? You can click and drag, while holding the Alt/Option key, over any part of the quilt that is still in the selection. (I find using the Alt/Option key to remove parts from the selection is much more sensitive than making the original selection. That’s a good thing in my opinion.) Now press the delete key on your keyboard. I like this way of removing the background the best. I feel Photoshop does a better job of finding the edge than any of the other methods. Plus if I still need to refine the selection more, I can undo the delete and use other selection tools to add or subtract any stray bits.
Now that we’ve tried them all, here’s the order I use the tools:
- Magic Wand and the Delete key. Why? One click can select all the pixels of a certain color. You might get lucky and get a good selection. Often there is still a little outline of the background color left around the quilt.
- Quick Selection Tool and the Delete key. For most simple background removals, this is my “go to” tool. The tool does a pretty good job, and it’s easy to to add to or subtract from the selection. Usually there’s not any of the background color along the edge of the quilt. What’s nice about this is that you can put a layer of any color below this layer to change the background color.
- I really don’t use the background eraser or the magic eraser. But stay tuned, Photoshop added a “Refine Edge” button. I’m going to play with the options in that window and let you know if that changes my mind.
Which method works best for you?
~~~~~~~~~~~~~~~~~~~~~~~~~~~~~~~~~
* Remember, the background image is locked so when you “delete” pixels, you replace them with the background color. In other words, it’s not advisable to work on the background layer. Copy it first. That copied layer will be unlocked.
2 responses to “Tech Tuesday: Removing Backgrounds from Quilts”
Thank you-I really need this! Haven’t tried it yet so no opinion on which I prefer.
You should also tell them about the tolerance number in each of these tools and how it makes a finer selection depending on what it is set at.