
Hey! We’re back with a special edition of Tech Tuesday . . . on Thursday. Many people have asked us to create a little primer on watermarking the images you want to post on the Internet. Here’s how to do it with Adobe Photoshop Elements. We’re using version 2018 in this example, but this process is similar in all version of Elements. There is a video following the step-by-step instructions.
Type the Text
- Open Photoshop Elements Editor. Don’t just click on the image–your computer might be set to open another application by default.
- Make sure you are in the Expert mode. Yep! You’re now an expert. Wink, wink. (You can click on most images below to open a larger version.)

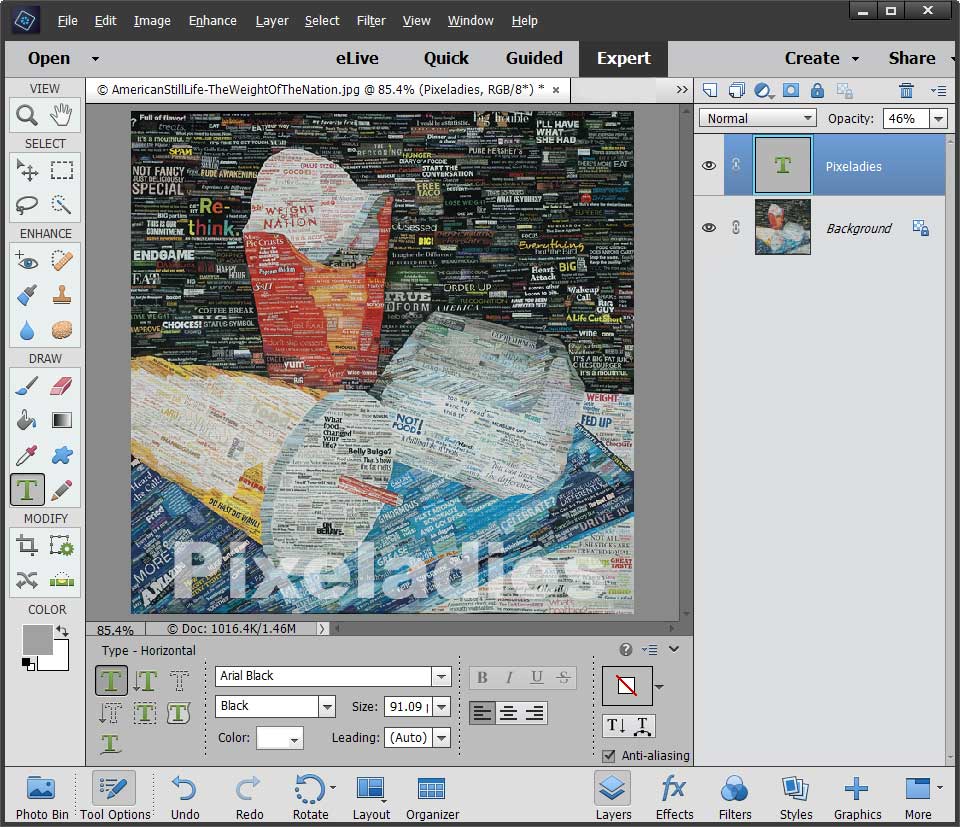
Expert mode - Use File > Open to open the image you wish you watermark.
- Click on the Type tool
 . It’s located toward the bottom of the toolbar. Choose a font type, size, and color. If you don’t see these choices, make sure “Tool Options” is selected in the lower left corner of your Elements workspace.)
 - Click somewhere on the photo and start typing your words. If you want to use the copyright symbol, the shortcut for Windows is Alt +0169. The shortcut for Mac is Option + G.
- When you are finished typing, click the green check mark.

Green check mark - If you want to resize or move the text, select the move tool.
 To resize the text proportionately, drag one of the corner boxes that surround the text in a diagonal direction. If you want to move the text, place your cursor somewhere in the text and drag it to where you want it.

Change Opacity
To create the see-through look, you need to change the opacity of the text.
- Open the Layers panel by pressing F11. This is a toggle, so if the Layers panel is already open, pressing F11 will close it.
- Make sure the Text layer is selected. (It will usually be a darker color when selected. It’s blue in the image below.)

Layers panel - Click on the down arrow next to the Opacity %. Move the slider bar until you like the look of the text.
- Save the image by selecting File > Save As. Choose a location for the file and give the image a name. Because you want to put this image on a website or social media page, don’t use spaces or special characters other than “_” or “–” (the world wide super highway doesn’t like spaces). Also make sure the Save as type is “JPG (*.JPG, *.JPEG, *.JPE)”.
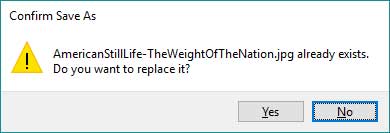
- Press Save. If you get a warning message, like the one below, choose No and give the file a different name or add some letters like WM, for watermark, to the end of the name. If you don’t give the file a different name, your original image will permanently have the watermark and you don’t. want. that.

Warning
- When the JPEG Options dialog box opens, choose a quality/file size*.
- Press OK.
Here’s what the watermarked image looks like:
The Video
Click on the video below to watch us demonstrate how to make the watermark.

*If you want to learn about file quality or some other ways to use Photoshop Elements in your art, check out our online classes at www.pixeladies.com/classes/
4 responses to “Tech Tuesday: Watermarking your Images”
Thank you so much for sharing. I would never have figured it out.
You’re welcome, Susan.
Thank you so very much for this! I dug right in. Need more practice but I think I’ve got the hang. You guys rock!
Thanks for the kind words, Guila. Happy watermarking!