
This is Deb with another Tech Tuesday blog post just in time for the holidays. Today it’s all about custom shapes. There are a lot of things we like about Photoshop and Photoshop Elements, but their selection of custom shapes is not one. Fortunately there are a lot of clever, artistic, and generous people out there who make shapes that you can use in Photoshop.
Search for Custom Shapes
Let’s say you want to make something Christmas-y and you’ve looked through all of Photoshop’s custom shapes and don’t see what you want. You can search the Internet for “Custom Photoshop Shapes Christmas.” Lo and behold there are hundreds of shapes out there. I clicked on the first link, and it brought me to a page with a link to a set with both Christmas and Hanukkah shapes: https://www.deviantart.com/hurleyrocks/art/Christmas-Shapes-187700566.
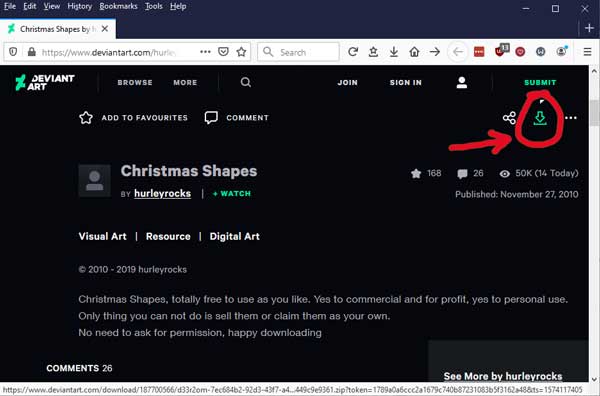
I looked at the website’s notes, and they said I could download the shapes for any reason, personal or commercial, and I didn’t even have to credit the artist. Woo hoo! Just what I was looking for.
Download the Shapes
I clicked on the download arrow (red circle in the image above), told Windows I wanted to save the file, chose a folder I would remember, and clicked save or OK. The rest of the directions are:
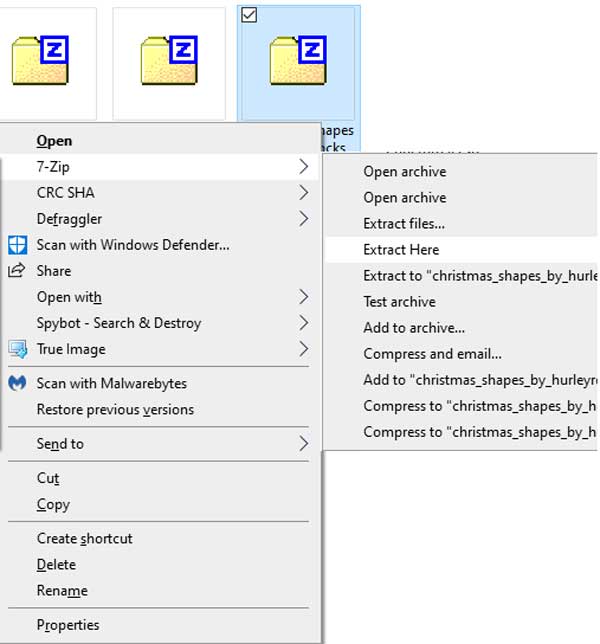
- Navigate to the folder where you saved the file. Usually the file with the shapes has a file extension of .zip.
- Since this is not the kind of file Photoshop can handle, you need to unzip or extract the file.
- Right-click the file name, and if you have an app to unzip the file, it should appear on the list of options. (I use 7-Zip.)
- Choose Unzip here. That will put the Custom Shape file (.csh) in the same folder.
Add Shapes to Photoshop
Now you need to copy and paste the .csh file to Photoshop Element’s Custom Shapes folder. Where is that folder? Well it’s buried really deep in your C drive. Here’s the path:
- On Windows: Open Windows File Explorer. Choose your C drive, then Program Files [or Program Files (x86) if you have a 64-bit system] > Adobe > Photoshop Elements xx [your version number] > Presets > Custom Shapes.
- On Mac, go to Applications > Adobe Photoshop Elements xx [your version number] > Support files* > Presets > Custom Shapes. [*You may or may not have the Support files folder. If not, just look for Presets].
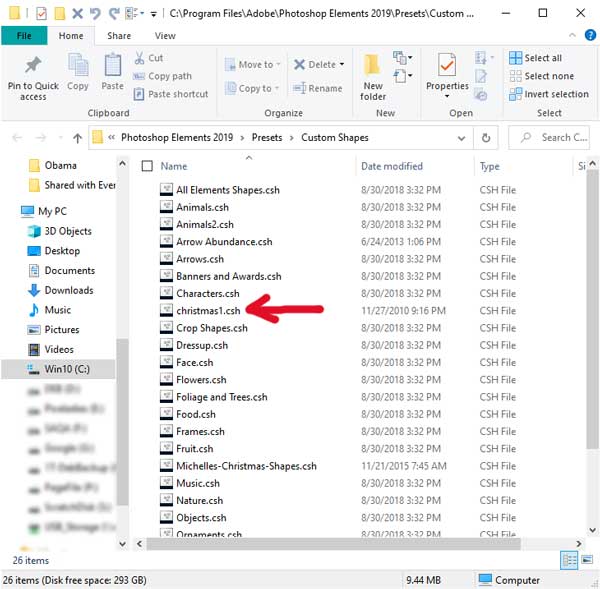
- After you copy and paste the .csh file into the Custom Shapes folder, you can open Photoshop. If you already have Photoshop Elements open, close it (after saving your work) and open it again.
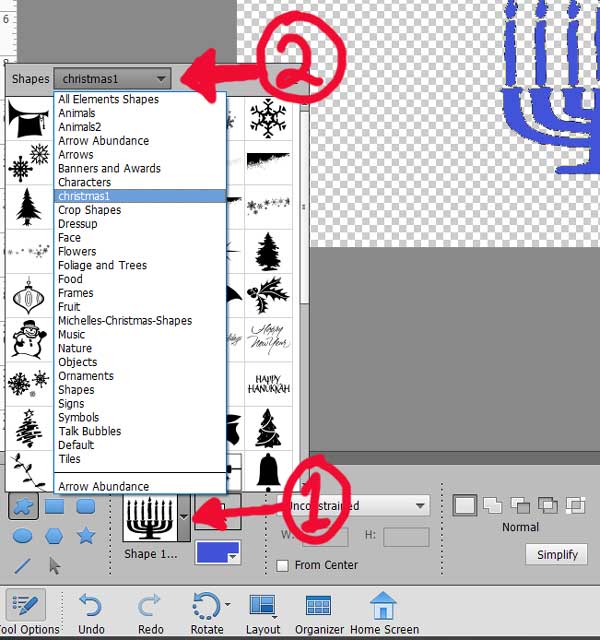
- Now open a file, choose your Custom Shape Tool from the tool bar and open the dropdown menu next to the shape icon (1), then open the dropdown with the list of names (2). You should see the name of the custom shape file you just copied and pasted. Click on that name and choose one of the new shapes to use.
From arrows to zoo animals, you can find almost any kind of custom shape on the Internet. We’ll get you started with a link to a website that has oodles of them: https://www.brusheezy.com/shapes.
One response to “Add Custom Shapes to Photoshop Elements”
[…] notes to write. You probably know about the custom shape tools in Photoshop Elements (PSE). And if you read our previous post on shapes, you know how to add shapes to the ones that come standard with PSE. But, did you know you can […]