
When you’re down and troubled
Carole King
And you need some love and care
And nothing, nothing is going right…
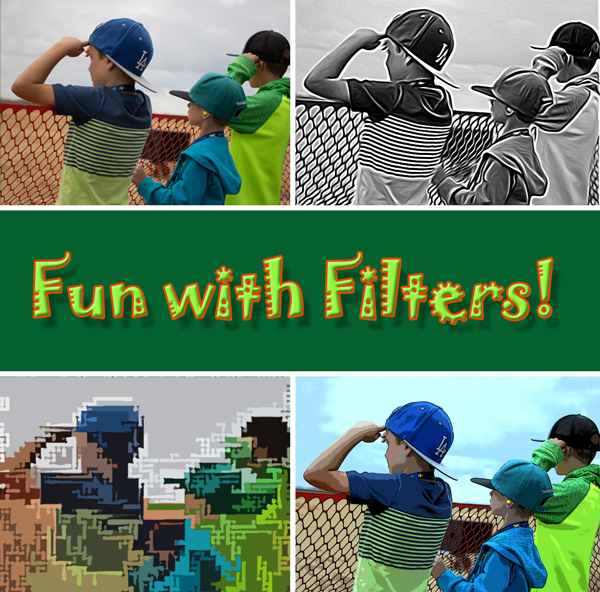
Since you can’t visit your friends, why don’t you open a photo in Photoshop Elements and just play with the filters. (Sorry Carole King and James Taylor.)
But don’t be satisfied with using just one filter, try multiple filters. You might be surprised at what happens when you push some buttons and slide some sliders. Kris wrote about some “hidden filters” in a previous post. But wait, there’s more. In preparing for writing this post, I discovered a couple of other sneaky differences depending on how you access the filters. Let’s review.
Three Ways to Access Filters

- From the Menu bar at the top of the workspace, choose Filter > Filter Gallery…. Not all of the filters are shown in the Filter Gallery.
- From the Menu bar, choose Filter and then click on one of the types of filters. For example Filter > Sketch > Comic. And you’re correct, this is one of the “hidden filters” that doesn’t show up in the Filter Gallery. In fact, I thought it was a new filter in PSE 2021, but it’s been there for years!
- From the Filter Icon in the lower right area of the workspace. You may have to click the More button, depending on your workspace. Yes, that’s the same as clicking Windows > Filters from the Menu bar. The filters will be shown in a palette. Your options may be limited using this method. “Chalk and Charcoal” is one example of where the settings are limited.
So which way should you choose? Well, it depends on what you want to do. Method 1 may not list all the filters, but there may be more options using this method. You can also apply multiple filters at one time, turning them off and on before actually applying the filter. Since we want to demonstrate applying multiple filters at one time, this is the method we’ll be using.
Adding Multiple Filters at One Time
- Open an image.
- Duplicate the layer, so you’ll still have the original untouched.
- Use Method 1 to access the Filter Gallery.
- Apply a filter by clicking on one of the thumbnails. If you don’t like it, try adjusting the settings on the right side of the gallery window. If you still don’t like it, choose a different filter. Use the + and – buttons in the lower left to zoom in and out.
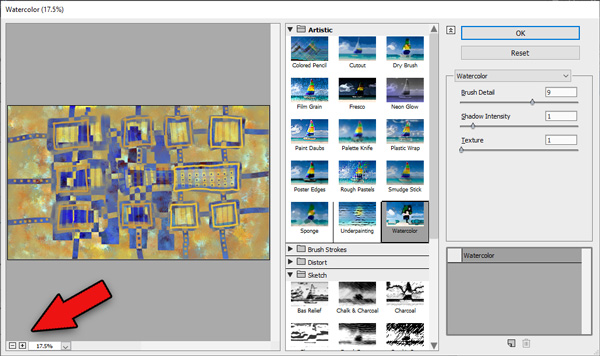
To add another filter to this filtered image, click on the icon that looks like a page with a corner folded up (the red arrow below).
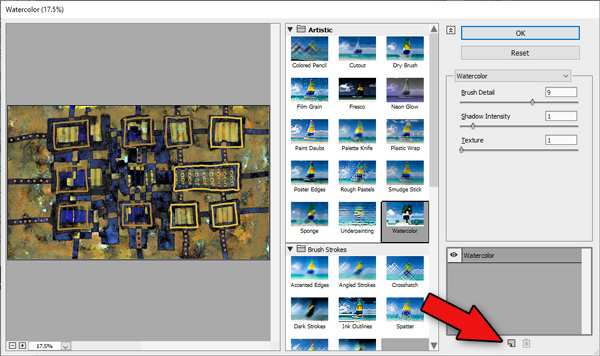
This action adds a new filter “layer” with the same filter that you are currently using. Notice that even the same filter applied twice gives a different result. To change the second filter (the one that’s gray is the active filter layer), click on a different filter thumbnail. The name of the layer will change to the filter you just applied. The image below has two filters applied while you are still in the filter gallery.

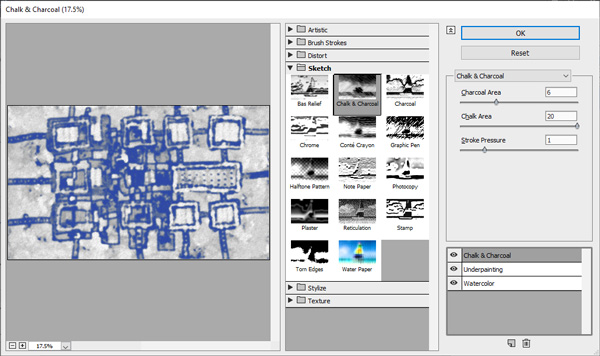
Repeat the procedure to add more filters. Remember: some filters are affected by the colors in your color swatches in the Tools panel. You can’t change the colors in the filter gallery dialog box, so you would have to cancel, change colors, and reopen the filter gallery. Below is the image with three filters applied. The Chalk and Charcoal filter colors are blue and white because my foreground and background colors were set to blue and white.
Deleting or Turning Off Filters
If you decide you don’t like the Chalk and Charcoal filter, you can delete it by clicking on the trash can in the lower right corner, or make it invisible by clicking on the eye in the filter layers. Note: unlike the regular Layers panel, you don’t drag a filter layer to the trash, you just make sure the layer you want to get rid of is active (gray) and then click the trash icon.
You can keep on adding and changing the settings of the filter layers as much as you like. Another point to remember is that the order of the filter layers matters. The lowest filter is the first one applied, the other filters are applied to the layer below it. So if you drag the Chalk and Charcoal filter to the bottom of the stack the colors will immediately change to the grays and blues (or whatever colors you have set) and any filter above that will not add the original colors back. Just play with the filters, the settings, and the order of the filter layers to change the results. When you’re happy, click OK in the upper right. If you don’t like what you’ve created, click cancel, or press Escape (ESC) on your keyboard.
One More Thing
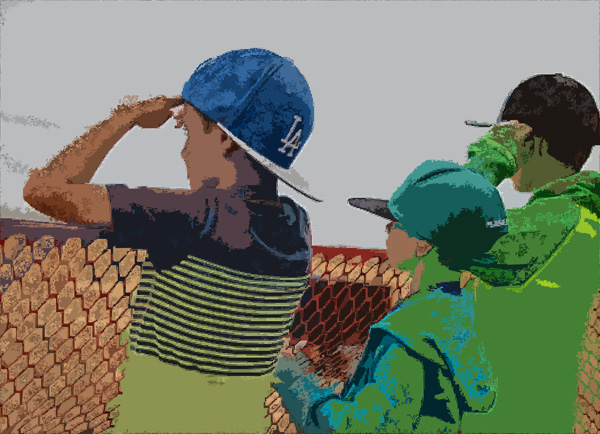
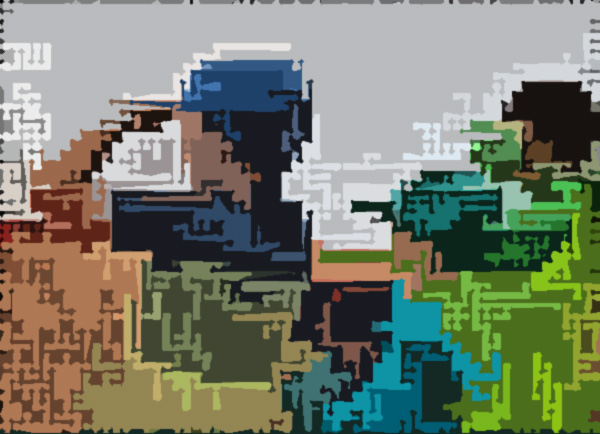
The number of pixels in your original image can make a big difference in what the applied filters do to the image. If you’re not getting the results you like, try making the image resolution smaller before you start. The images below are made using the same filters on the “same” image. The first one started out 5700 pixels wide and the lower one was reduced to 600 pixels wide.
Wanna Learn More?
If you have other things on your to-do list, you might want to set an alarm. Hours can go by very quickly when you’re playing with filters. If you want to learn more about Photoshop Elements, consider signing up for one of our classes. Registration is now open.
6 responses to “More Fun With Filters In Photoshop Elements”
Great blog. I’m likely to take a ‘long’ lunch (skip 2 martinis and play with filters) here in my remote office. Thanks for all you do to bring smiles to our faces!
Good for you, Sharon! We long those long lunches, too.
Thanks, Sharon. Have fun.
[…] we alluded to the importance of image resolution for your creative output. You can read that post here. Today we want to show you how the use of different image resolutions creates effective results in […]
[…] you want to read our posts on using filters, check out the links here, here and […]
[…] you want to read our posts on using filters, check out the links here, here and […]