
There are lots of little differences between the professional Photoshop Creative Cloud and the consumer Photoshop Elements that we have always missed when teaching Photoshop Elements. For sure, Photoshop Elements is really all most of us need to do what we want to do, but yet . . . .
One thing that we always wished we could do in Photoshop Elements is group our layers. When we create a design, especially for scarves, we sometimes have a gazillion layers. (Well, not really that many, but we could have 8,000 layers!) And, you can only see so many layers at a time on your screen. One way to organize your layers is to group them together. Well, Adobe finally saw fit to include it Photoshop Elements (Version 15 or later). Yay!
Create a New Group
At the top of the Layers panel, you will see the “Create a new group” icon:
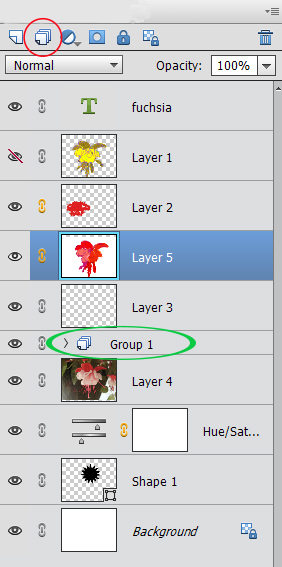
Click on the “Create a new group” icon (red circle) to create a new group (green ellipsis). You can then drag and drop any layers you want into that group. You can also highlight the layers you want to group together (Ctrl + click, or command + click on Mac) and then click on the “Create a new group” icon. (One great thing about Photoshop is that there is always more than one way to do something, and the best way is always the way you remember!)
Example
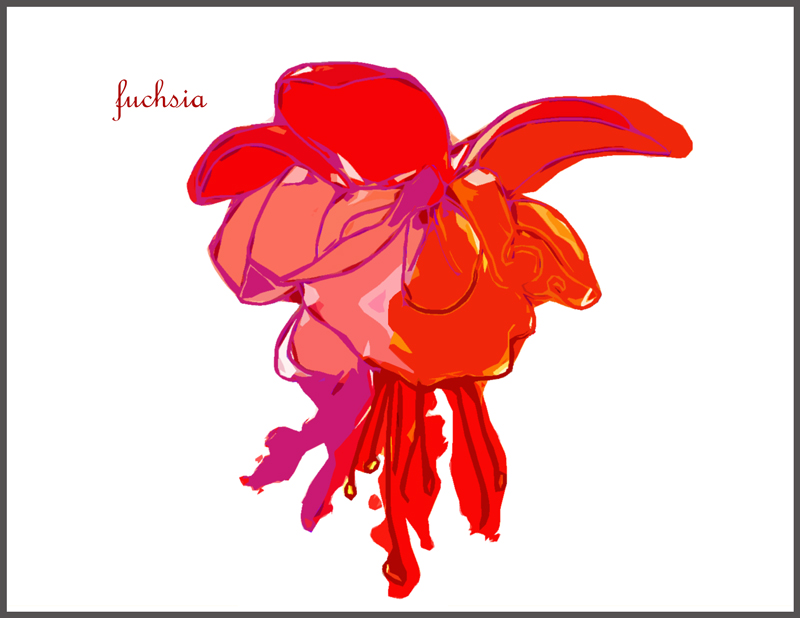
Here is an example of an image as we see it on our workspace:
Let’s take a look at the Layers panel for this image:
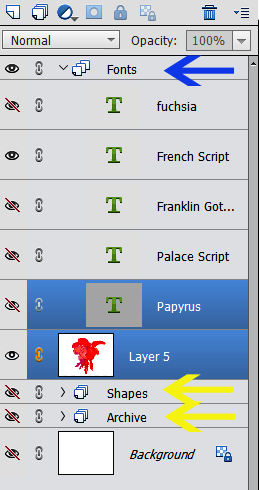
This image has three different groups: Fonts, Shapes, and Archive. The “Fonts” group is open (blue arrow), the other two are closed (yellow arrows). You can open and close groups by clicking on the small arrow to the left of the layers group icon in the layer. You can see how much easier it is to view more layers by using groups. You can turn an entire group on or off by clicking on the eye in the layer that has the group name on it. As you can see in the “Fonts” group above, you can also turn off individual layers within a group.
Uses for Layer Groups
There are many uses for groups. Here are our favorites:
- group layers in order to move them together.
- create an “archive” group in order to keep layers you’re not using but aren’t quite ready to delete. Trust me, we do this one a lot!
- keep like items together. In our example, we have a font group with four different versions of the word “fuchsia.” When we are looking for a specific font, we’ll often “audition” different fonts before deciding on one. It helps to keep them in a group.
- create groups to shorten the Layers panel. In our example, we put a bunch of shapes together. We currently have that group turned off.
Group Layers vs. Link Layers
Many of you might be thinking about now that you can move your layers together just by linking them. You are correct. Linking layers is a great tool (especially if you have an older version of Photoshop Elements). However, you can’t scrunch up your layers panel in the way layer groups do. You’ll still see all your layers. Groups are just more powerful. We hope you start grouping your layers. It will help speed up your creative workflow.
If you want to learn more about Photoshop Elements, why don’t you enroll in one or both of our Photoshop Elements online courses. Our next session starts on July 9, 2018. Click here for more information and to register.