
Today’s blog post is the second of three where Deb shows you how to create a puzzle layout for your Instagram feed using Photoshop or Photoshop Elements (PSE). Last week we showed you how to create an appropriately sized file with guide lines. Your assignment was to create a collage or other beautiful looking file. This week, we’ll show you how to cut up (slice) that file into square sections suitable for posting on Instagram.
Slices
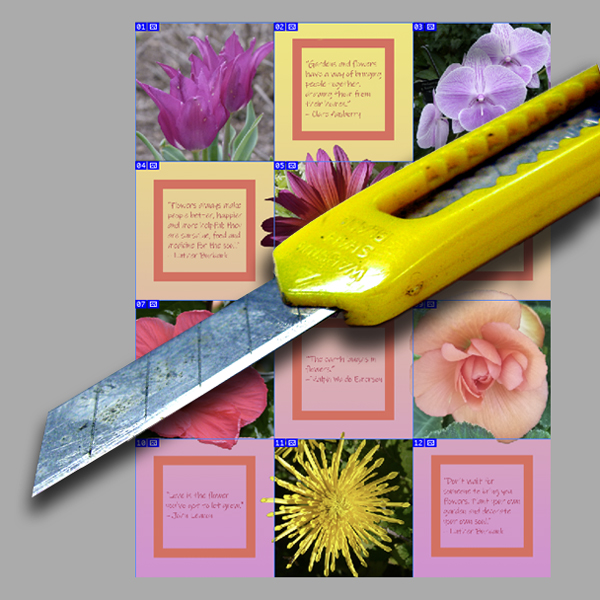
In Photoshop, the Slice tool looks like an exacto knife. The Slice tool is located with the Crop tool. The Slice tool is ostensibly unavailable in PSE. But, along with lots of other tools/functions, Adobe has just put an invisibility cloak on it. The wizards at Elements+ have created a program for making the Slice tool and other tools/functions available in PSE.
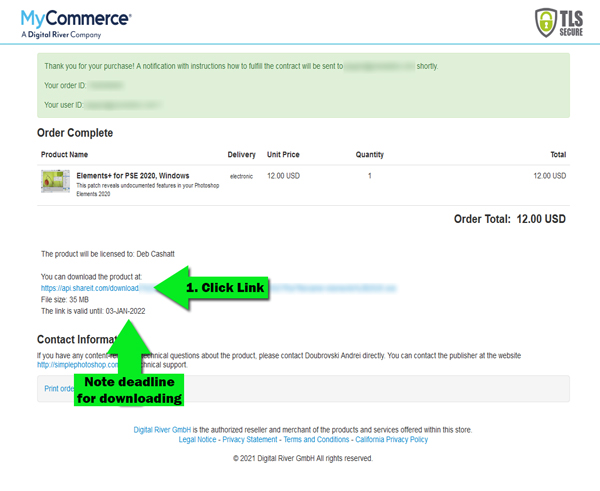
Although the Slice tool is unavailable in the Demo Version of Elements+ (e+), you can purchase the full version for a paltry US $12. With the full version of e+, you’ll have a program that unlocks a myriad of hidden Photoshop features. On the e+ home page, you’ll see a chart of the features available by PSE version number. The Slice tool is available for all versions from 6.0 onwards.
Downloading and Installing e+
Before we get into the how to create slices in PSE, you need to download and install the full version of e+. Here are the instructions to do so.
- Go to https://elementsplus.net/
- Click on the “Buy Full Version” tab.
- Click on the version of Photoshop Elements you want to use with e+. The website should know which operating system you are using, but if it doesn’t, look down at the bottom of the list and you will see an option to change to Mac or Windows.
- Go through the purchasing process and download the file when prompted.
- Save that file somewhere you will remember. I have a folder called MiscProgramFiles. If you don’t have an option of where to save the file, it will be in your default download location. Tip: if you don’t want to buy a physical copy of the software, remove the Backup Media item from your shopping cart.
- Close PSE before installing e+.
- Once you install e+, you will be taken to the e+ setup help files. The help files look like a webpage, and will open in your browser, but it’s actually a file on your computer. One thing that’s a little bit confusing is that the navigation bar on the left side is grayed out. Don’t be fooled, it actually works. For the Slice tool, scroll down towards the bottom of the menu and you’ll see a section about slices.
Creating Slices
Now let’s get down to making slices in Photoshop Elements.
- Using PSE, open your collage file (maybe the one you created according to our previous blog post). I’m using a file called flowers.psd.
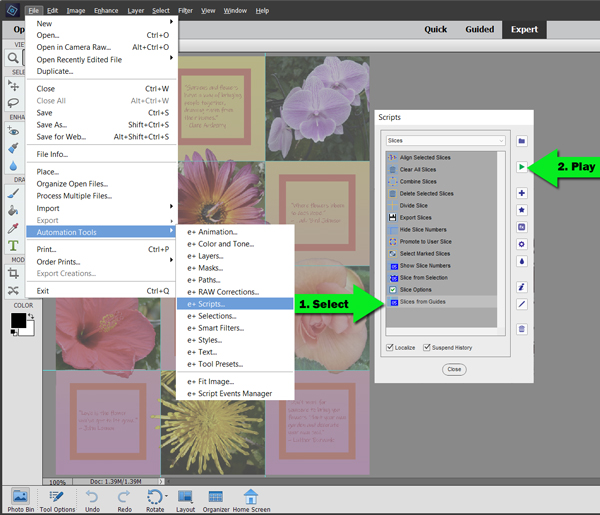
- From the PSE menu bar Choose File > Automated Scripts > e+ Scripts . . . . *
- When the e+ Scripts window opens, you will probably see the Favorites section. Click on the word Favorites or the down arrow next to the word and a drop down menu will appear. Choose Slices.
- Click on Slices from Guides.
- Click the Play button (the right-facing triangle icon on the right). You won’t see anything happen, but PSE is doing its magic.
- Go back to the Slices menu and choose Show Slice Numbers, and click Play. Now your image will have blue squares with numbers and an icon in the upper left corner of each square. Each square is now a slice. What does that mean? Well, nothing really at this point.
Saving Slices
Now that you have your slices, you will go about saving them.
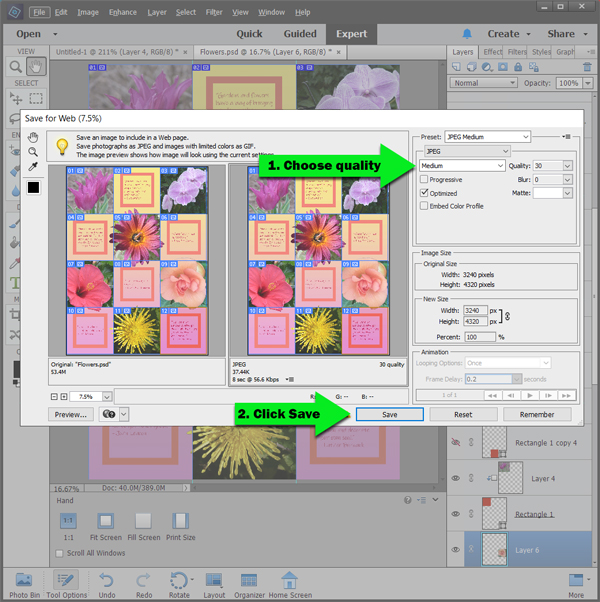
- Save your file using Save for Web (File > Save for Web).
- Choose JPEG and optimize your file size, I always choose low, unless it looks bad when I view the image at 100%.
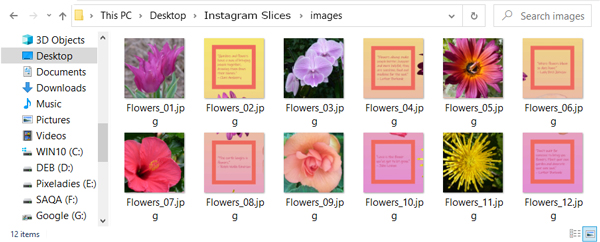
- Choose a location to save your files. I would create a folder called Instagram Slices and save the file there. PSE will save each square as a file with the name of your file and a number after it.
- When you open the folder (Instagram Slices in my example), you will see a folder called Images. Inside this folder are the sliced squares saved as individual files (e.g. Flowers_01.jpg, Flowers_02.jpg…).
Loading Files to Instagram
The final step is to load these files to your Instagram account. If you like using the Instagram app on your phone or tablet, you have to save or copy these files somewhere where your phone or tablet can access them. Try your Google Drive or other cloud file sharing service.
If you’d rather upload these files from your desktop or laptop directly to Instagram, we’ll show you a tricky way to do that in the next installment. Check back next next week.
And if you want to learn how to create collages in Photoshop Elements, like the flower image in the example we’ve used, consider taking our Photoshop Elements Essentials classes. We’re starting a new round in January 2022. Registration begins December 13, 2021. Click here for more information.
*If you had PSE open during the installation process, you will not see any of the e+ options in the automated scripts drop down menu. Close PSE and reopen it.
One response to “Create Instagram Puzzle Feed With Photoshop (Part 2)”
Thank you, this worked fine with E+!